Hello everyone! Are you enjoying building your RC car? This is the 5th installment of the “Tamiya The Grasshopper” build blog.
Last time, we installed the electronics onto the chassis, including the steering servo and receiver.
Tamiya Grasshopper Build Diary Vol. 6:Installing the Steering Servo & Receiver
This time, we will proceed with assembling the front section. We will attach the front arms and front dampers. Now, let’s get started with the assembly.
Assembling the Front Arms
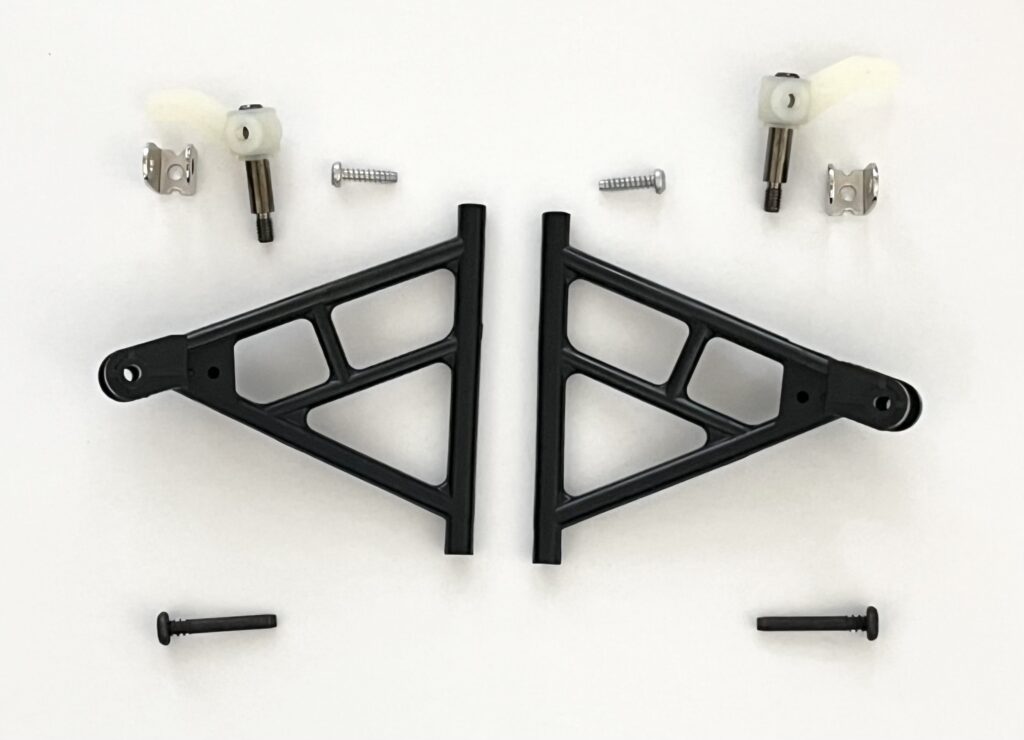
Attaching the Uprights
First, let’s assemble the front arms.
This corresponds to step “11” in the manual.

This part significantly affects the car’s performance. Let’s check the manual carefully and work with precision.
| Part Number | Part Name |
| A11 | Front arm (R) |
| A12 | Front arm (L) |
| BB1 | 3x12mm Tapping screw x 2 |
| BB2 | 3x22mm Screw pin x 2 |
| MD1 | Spring mount x 2 |
| MD6 | Upright x 2 |
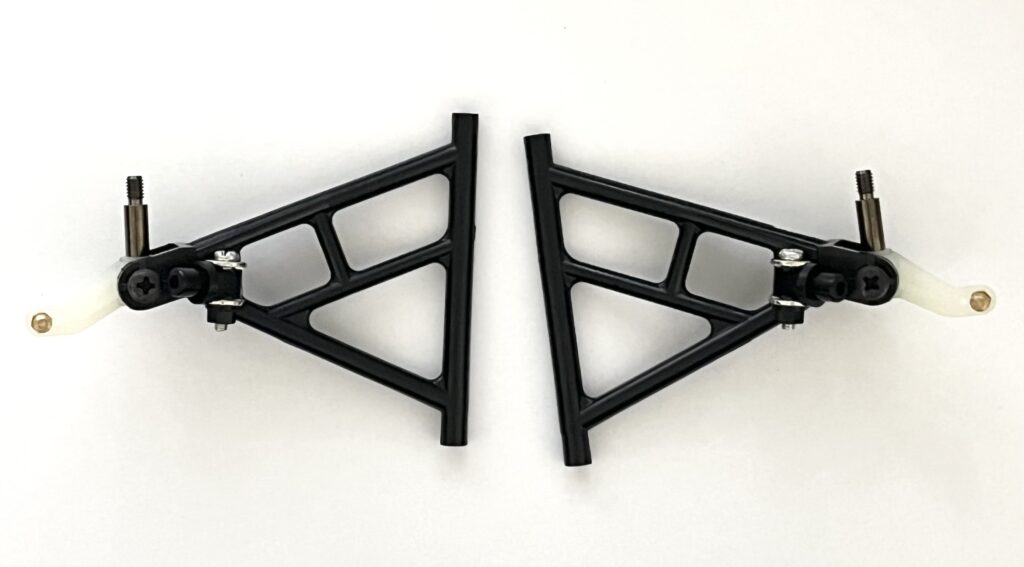
Attach the left and right uprights to the arms. (L) is for the left side, and (R) is for the right side. Be careful not to mix them up. Tighten the screws while checking their lengths.
At this stage, they are not yet attached to the chassis.

Assembling the Front Arms
Next, we will assemble the front arms.
This corresponds to step “12” in the manual.
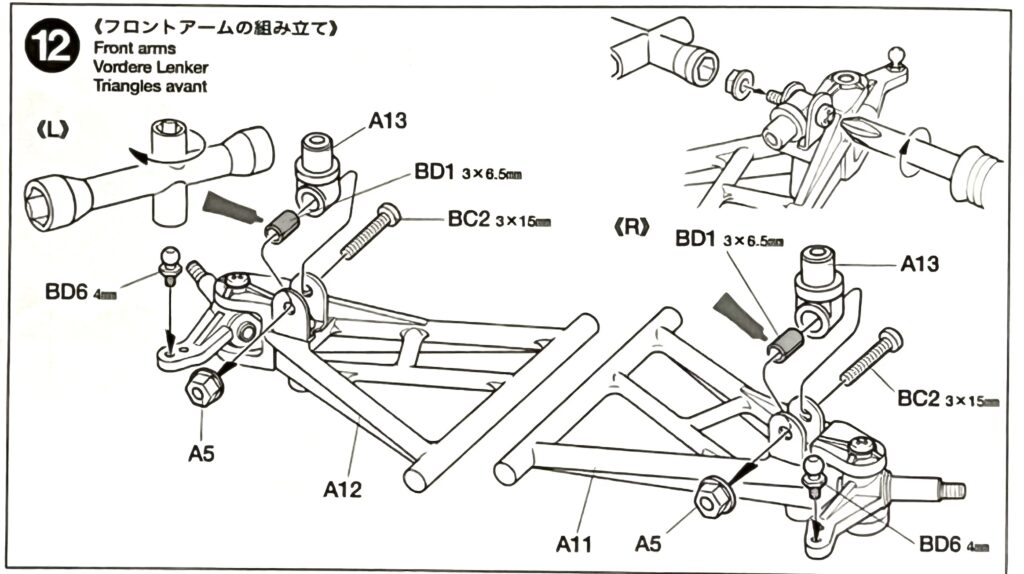
Again, be careful not to mix up the left and right sides. Also, check the orientation of the pillow balls.
| Part Number | Part Name |
| A5 | – |
| A11 | Front arm (R) |
| A12 | Front arm (L) |
| A13 | – |
| BC2 | 3x15mm Round screw x 2 |
| BD1 | 3×6.5mm Spacer x 2 |
| BD6 | 4mm Pillow ball x 2 |
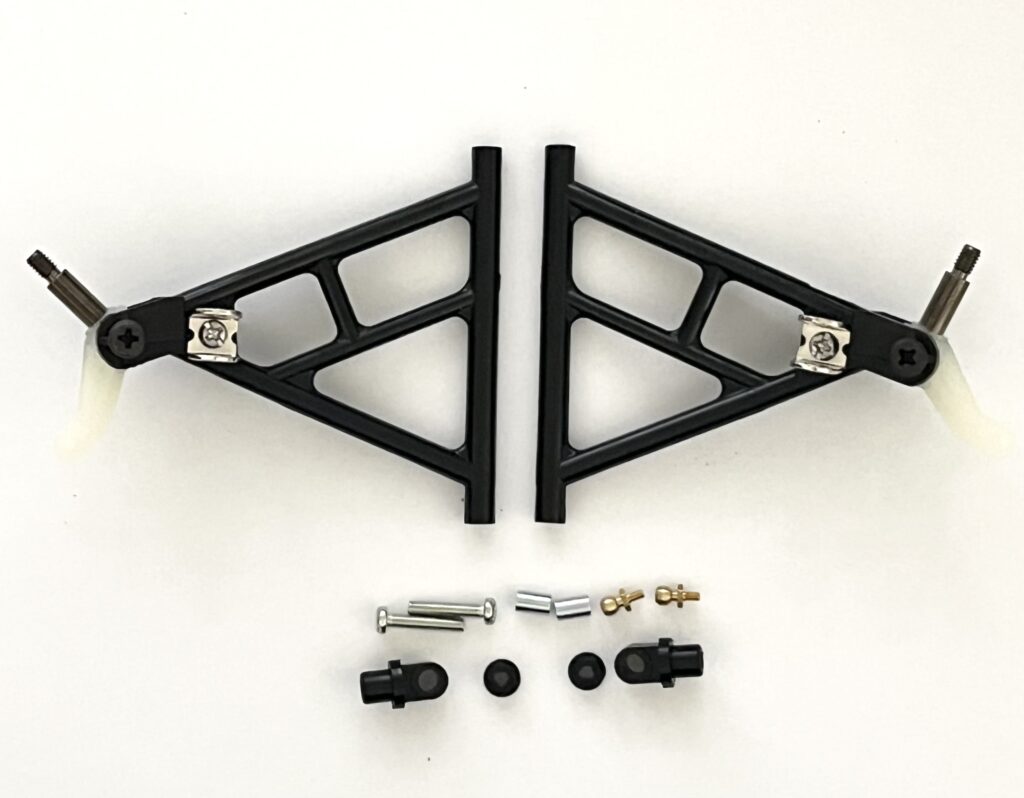
The front arm unit is now complete.
Attaching the Front Bumper and Front Arms
We will install the front bumper and the previously assembled arms to the chassis.
This corresponds to step “13” in the manual.
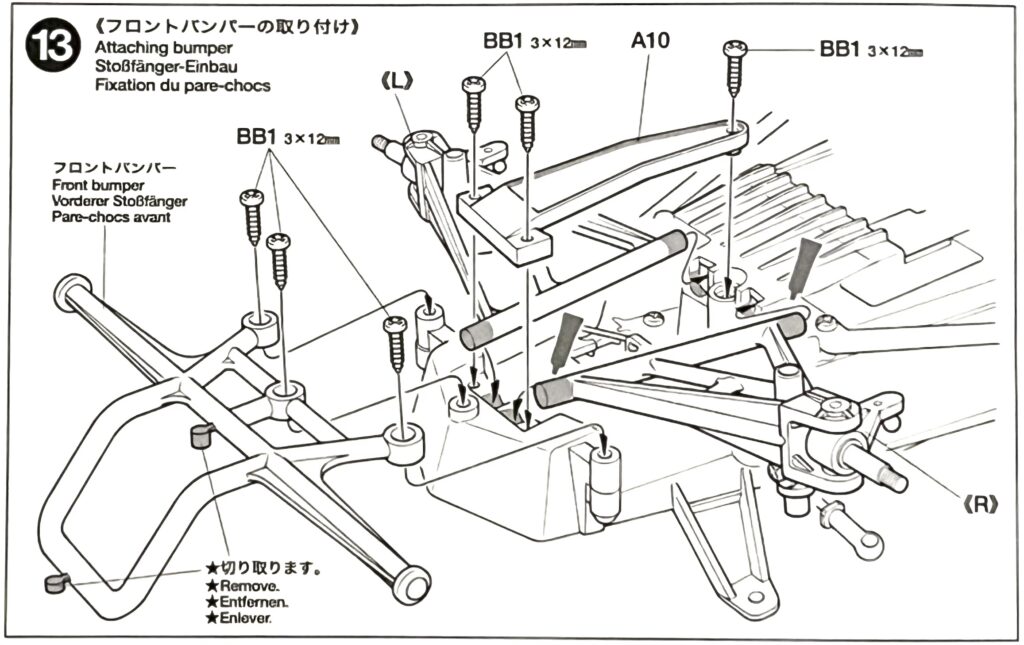
Secure them firmly with six screws. It’s starting to look like a real buggy now, isn’t it?
| Part Number | Part Name |
| A10 | – |
| BB1 | 3x12mm Tapping screw x 6 |
| – | Front bumper |
| – | Front arm (R) |
| Front arm (L) |
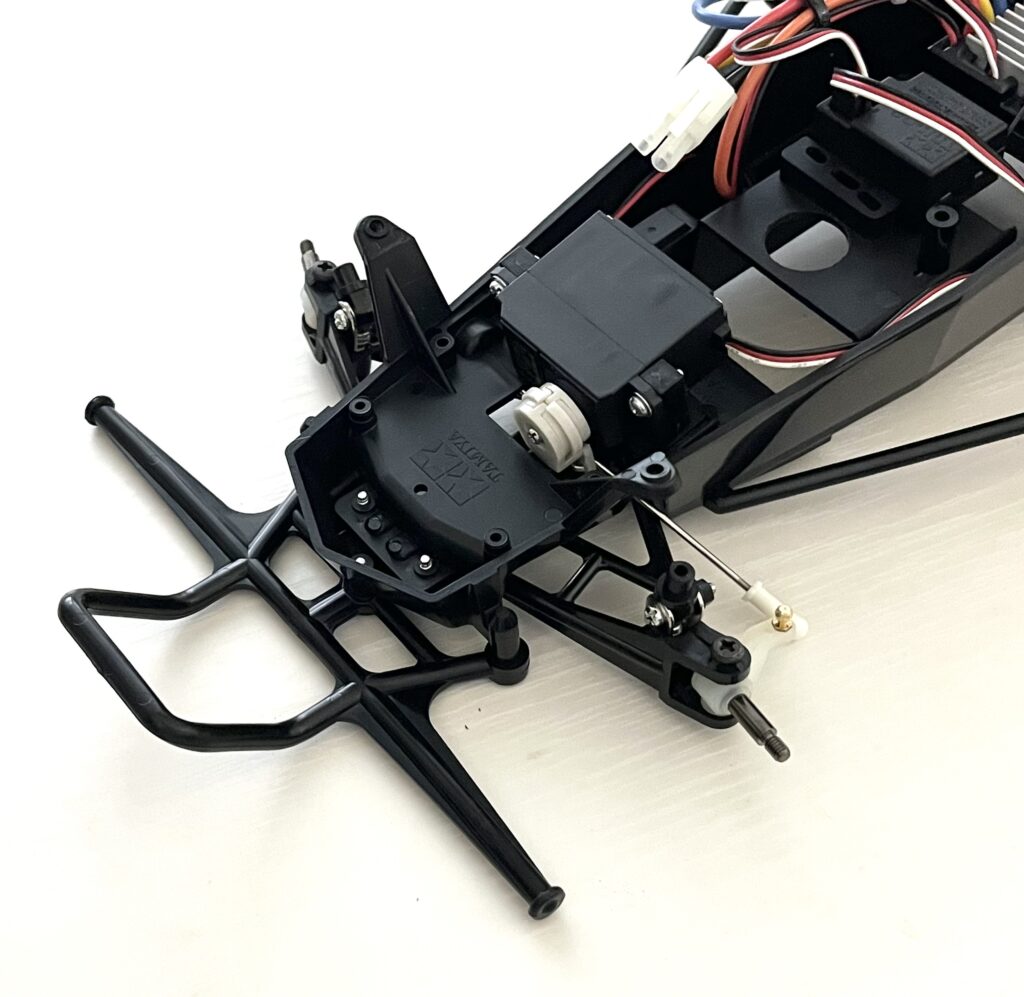
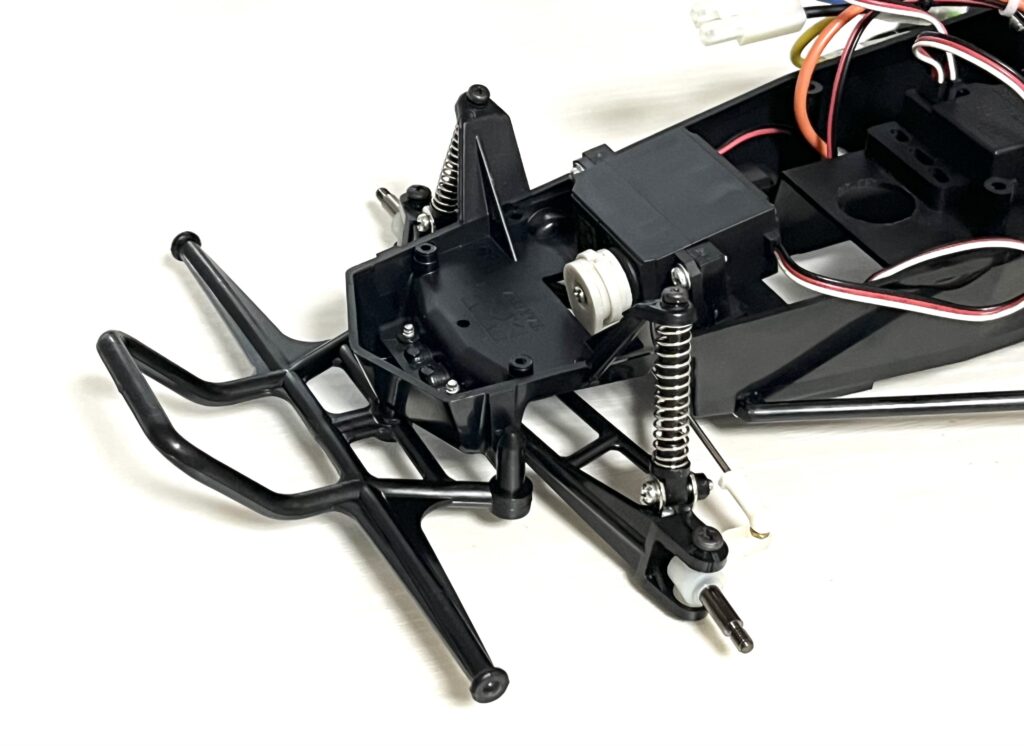
The framework of the front end is now finished.
Attaching the Front Coil Springs
Finally, let’s finish up the front suspension. We will install the coil springs (dampers).
This corresponds to step “14” in the manual.
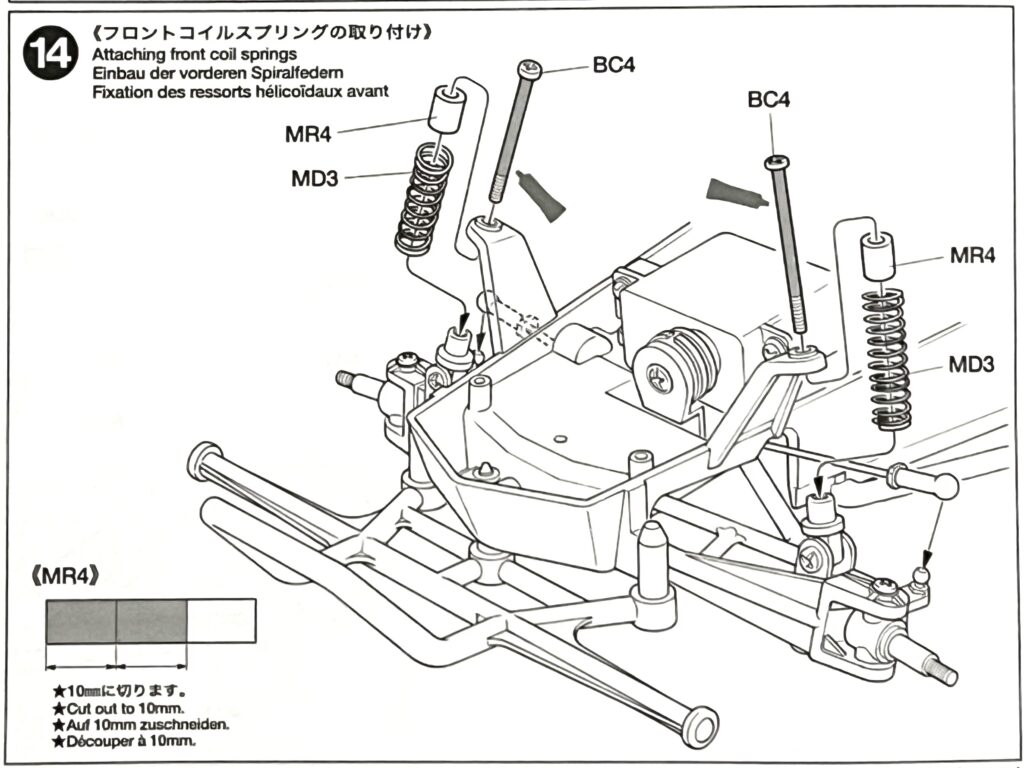
The springs will absorb shocks, enabling stable driving. Cut the MR4 part to a length of 10mm.

| Part Number | Part Name |
| BC4 | Damper shaft x 2 |
| MD3 | Front coil spring x 2 |
| MR4 | Rubber pipe |
| – | Chassis |
The front section is now mostly complete.
Conclusion
This time, we attached the front arms and dampers. It was a slightly complex process, but it has taken shape. The car is looking much more like an RC buggy now.
Next time, we will finally install the tires. We will assemble the front and rear tires. We are getting closer to completion, and it’s very exciting. Please look forward to the next update!

コメント