Hello everyone!
Welcome to the third part of the Grasshopper build blog.
Last time, we assembled the heart of the RC car: the gearbox and motor.
▼Click here for the previous article
Tamiya Grasshopper Build Diary Vol. 4:Assembling the Gearbox and Motor
This time, we will mount the assembled drivetrain to the main body.
We’ll be attaching the gearbox and building the rear dampers.
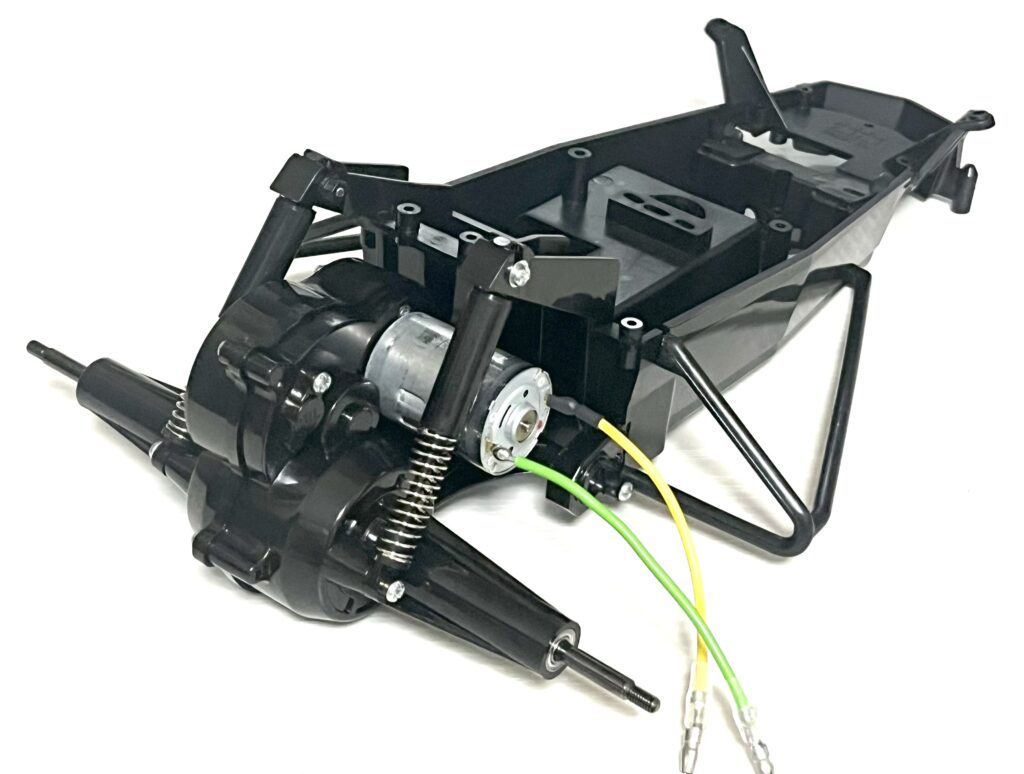
The chassis is finally starting to take shape!
Attaching the Gearbox
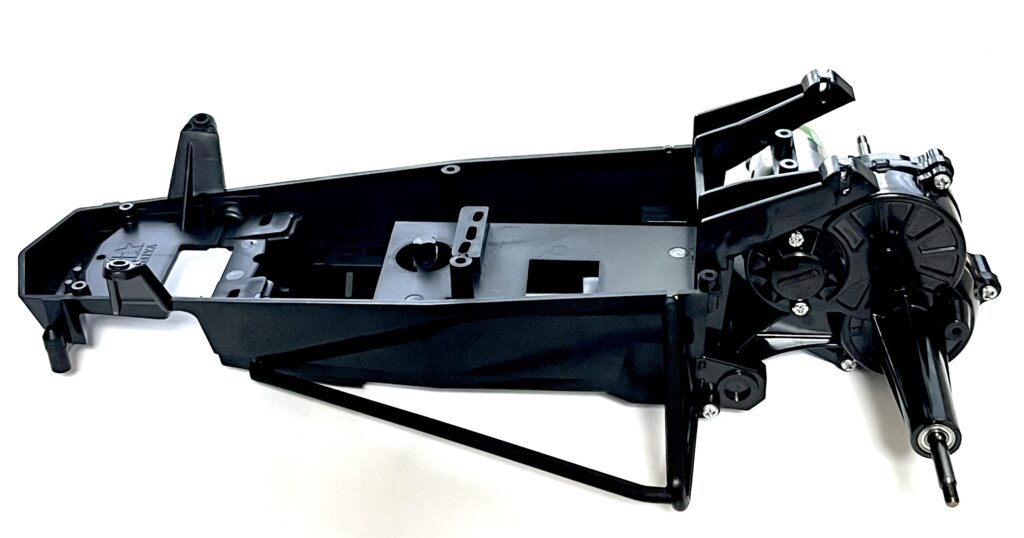
We will secure the gearbox unit we completed last time to the main chassis.
This step will quickly form the rear end of the machine.
This corresponds to step “4” in the manual.
We’ll combine the chassis, gearbox, and rear stays.
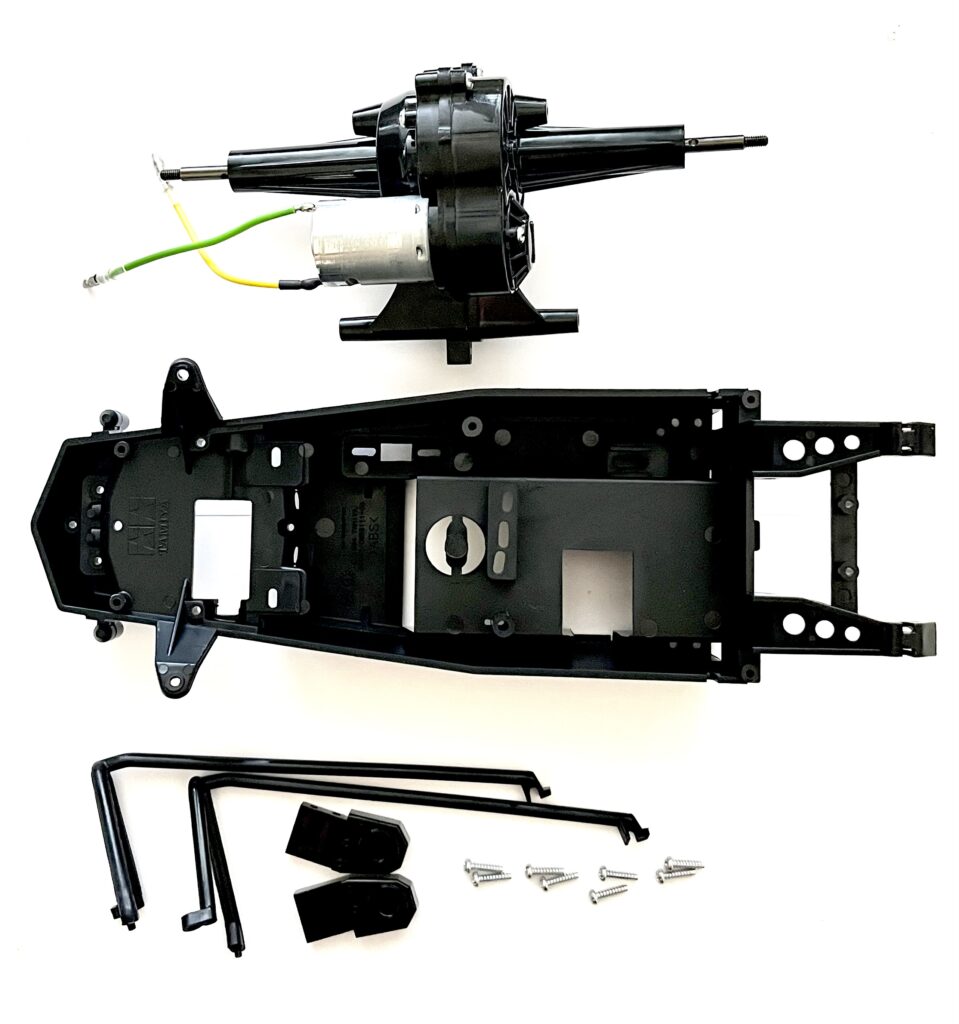
| Part Number | Part Name | Notes |
|---|---|---|
| – | Chassis | |
| – | Assembled Gearbox | From last time |
| C1, C2 | Side Guard | |
| B10, B11 | Rear Stay | |
| BB1 | 3×12mm Tapping Screw x 8 |
Fit the gearbox into the chassis.
Attach the rear stays and sandwich them with the side guards.
Tighten them firmly with the eight screws.
Attaching the Rear Dampers
Next, we’ll build the Grasshopper’s characteristic rear suspension.
This is step “5” in the manual.
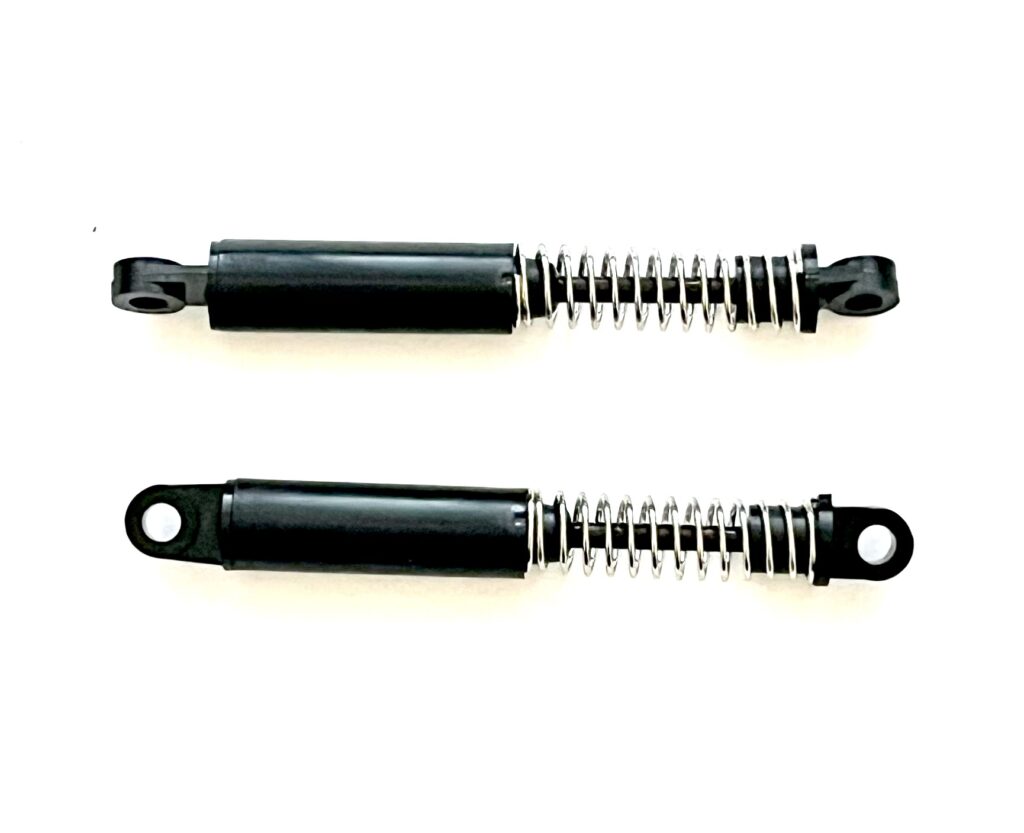
We will assemble two friction dampers.
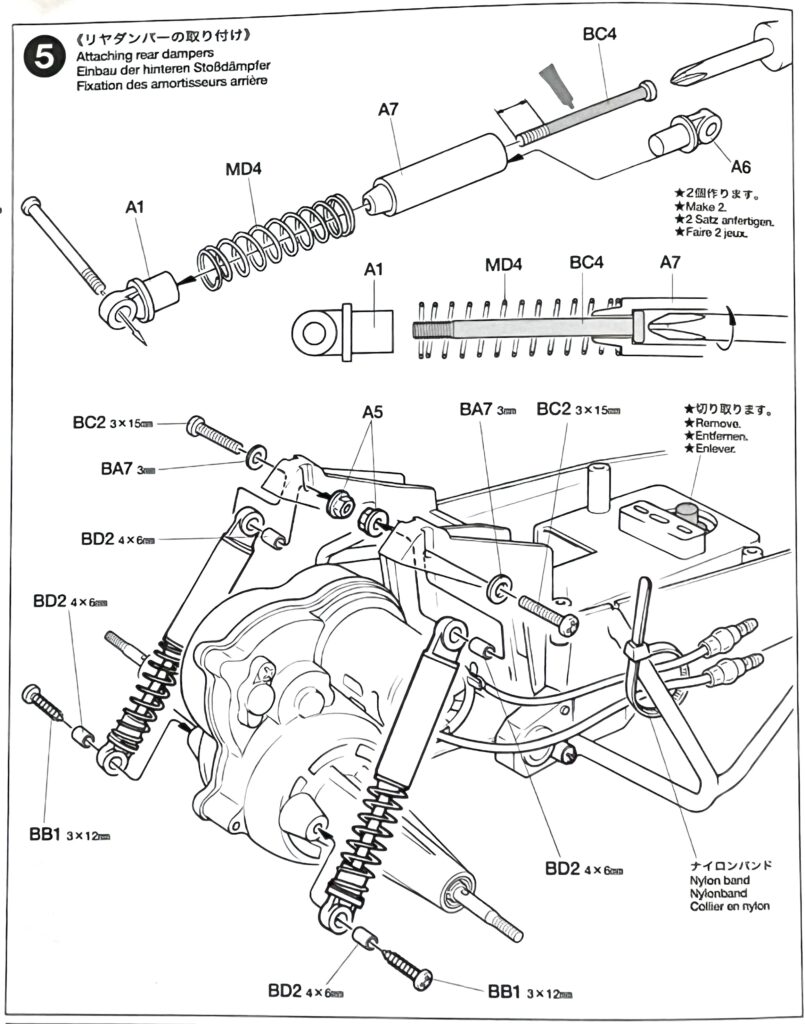
Building the Rear Dampers
First, let’s assemble the two main damper bodies. The structure is very simple.
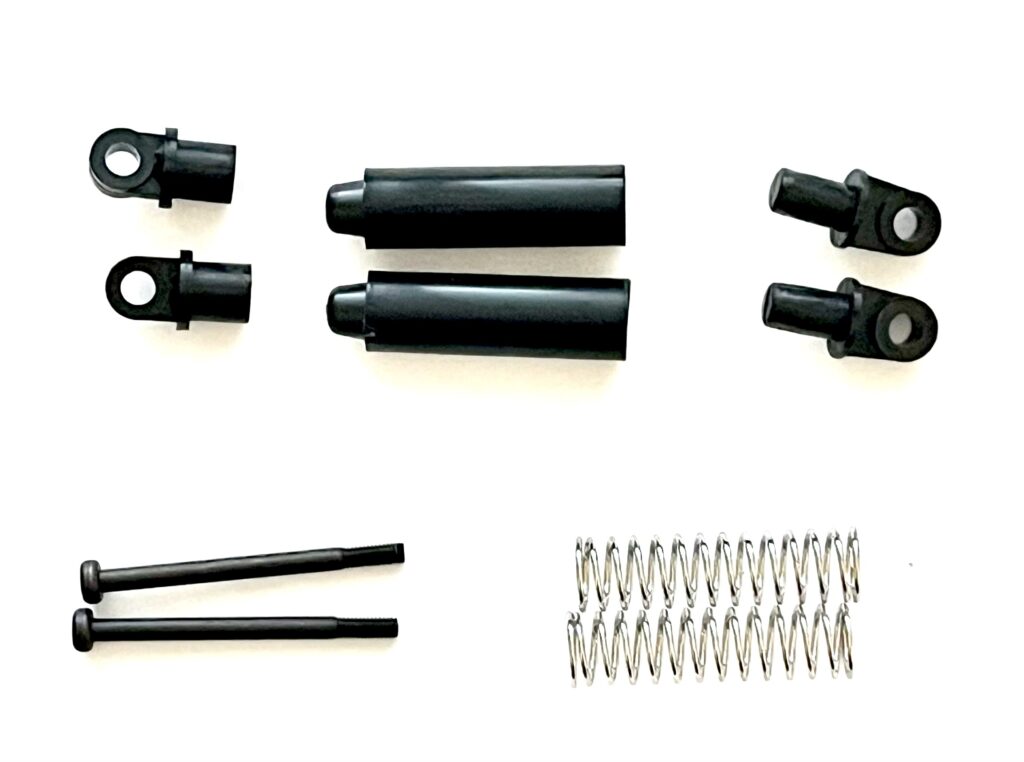
| Part Number | Part Name |
|---|---|
| A7 | Damper Cylinder x 2 |
| A1, A6 | Damper End x 2 each |
| BC4 | Damper Shaft x 2 |
| MD4 | Rear Coil Spring x 2 |
Insert the shaft into the cylinder.
Attach the spring and damper ends to complete it.
Let’s make two of these.
Attaching the Dampers to the Gearbox
Now, we will attach the completed dampers to the chassis and gearbox.
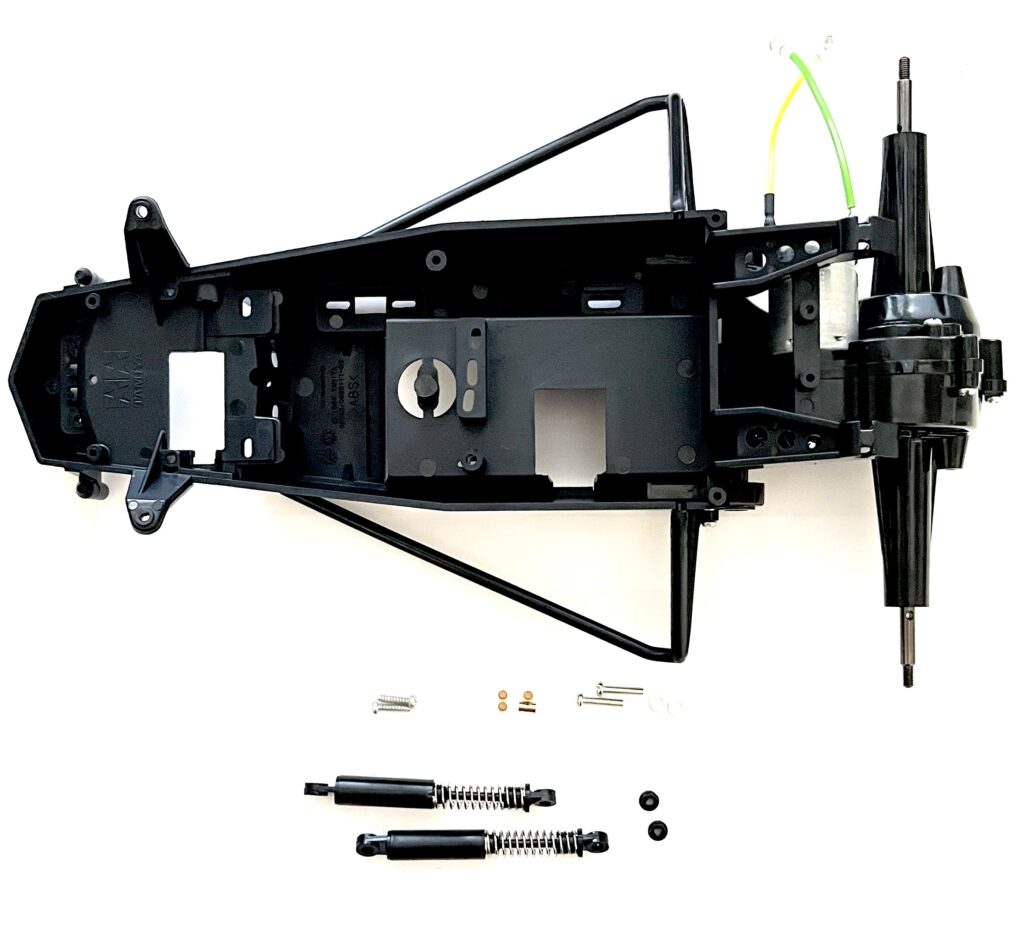
| Part Number | Part Name | Notes |
|---|---|---|
| – | Assembled Gearbox | |
| – | Assembled Rear Dampers x 2 | |
| A5 | Nut x 2 | |
| BB1 | 3×12mm Tapping Screw x 2 | |
| BC2 | 3×15mm Round Screw x 2 | |
| BD2 | 4×6mm Pipe x 4 | |
| BA7 | 3mm Washer x 2 |
Secure the top of the dampers to the stay.
Fasten the bottom to the gearbox to complete the step.
Conclusion
Great work!
This time, we’ve attached the drivetrain and rear suspension to the chassis.
The main frame of the machine is now mostly complete.
It’s really starting to look like an RC car.
Next time, we will build the steering rods and install the servo.
We’ll finally be installing the electronics.
Let’s have fun in the next part of the build!

コメント