Hello everyone!
Welcome to the second part of the Grasshopper build blog.
Last time, we assembled the rear shafts and the differential gear. A crucial part of the drivetrain is now complete.
▼Click here for the previous article
Tamiya Grasshopper Build Diary Vol. 3:Assembling the Rear Shaft and Differential Gear
This time, we’re working on the heart of the RC car.
We will assemble the gearbox and install the motor.
This section powers the Grasshopper’s performance.
Assembling the Gearbox
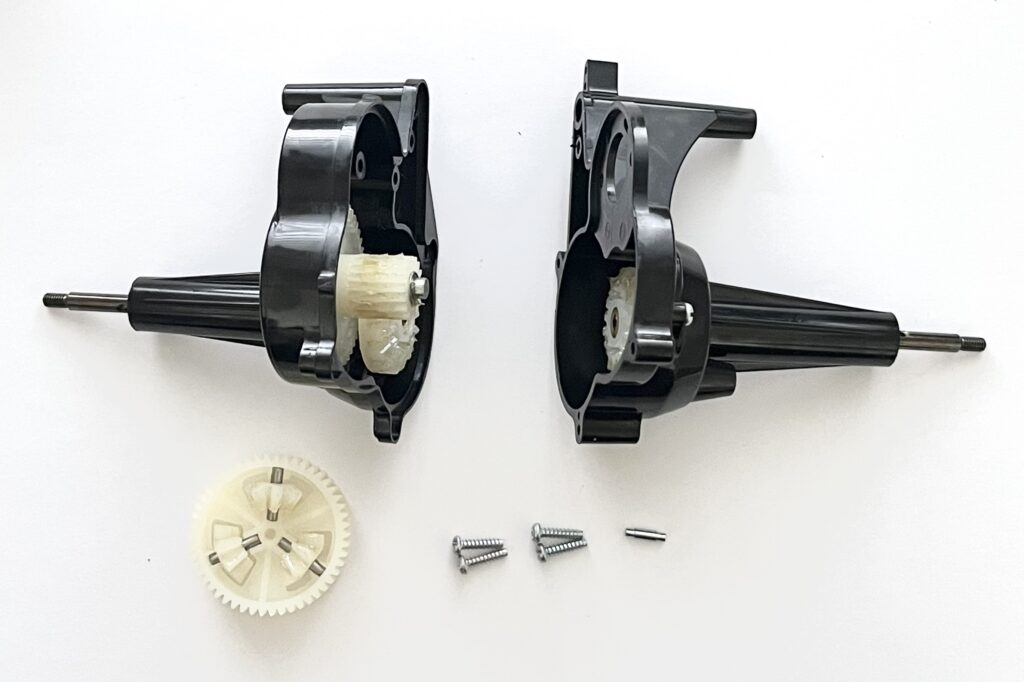
First, let’s combine the parts we built last time.
We will join the left and right halves of the gearbox.
This corresponds to step “2” in the manual.
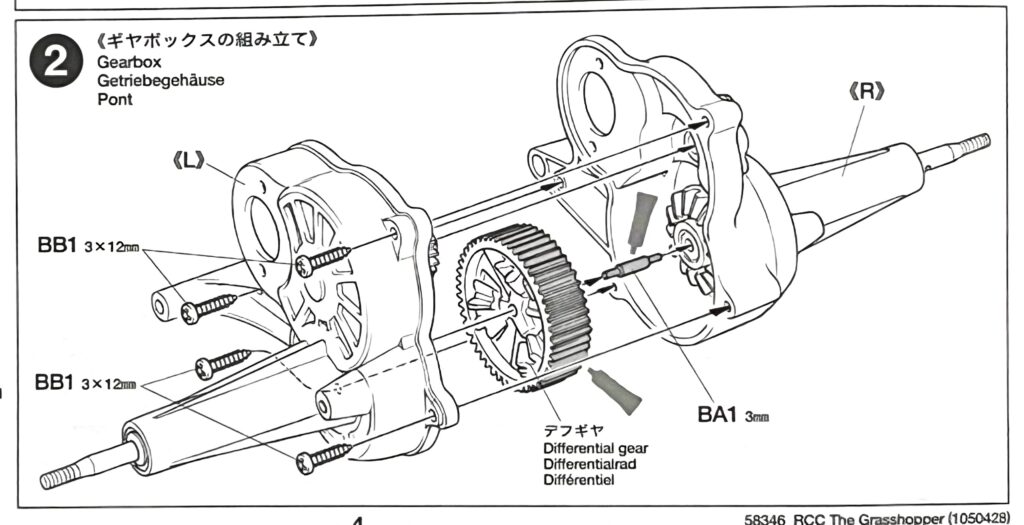
We’ll place the differential gear inside and close the case.
| Part Number | Part Name | Notes |
|---|---|---|
| – | Assembled Gearbox (L/R) | Since last time |
| – | Differential Gear | Since last time |
| BB1 | 3×12mm Tapping Screw x 4 | |
| BA1 | 3mm Diff Shaft |
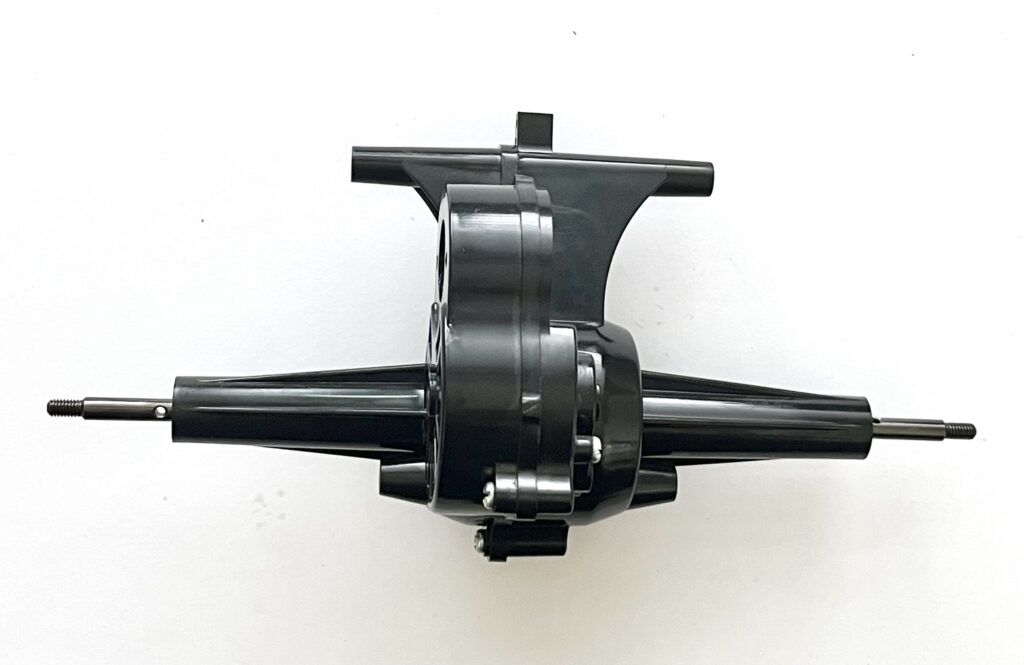
Close the gearbox halves, making sure the gears mesh correctly.
Secure it firmly with the four screws.
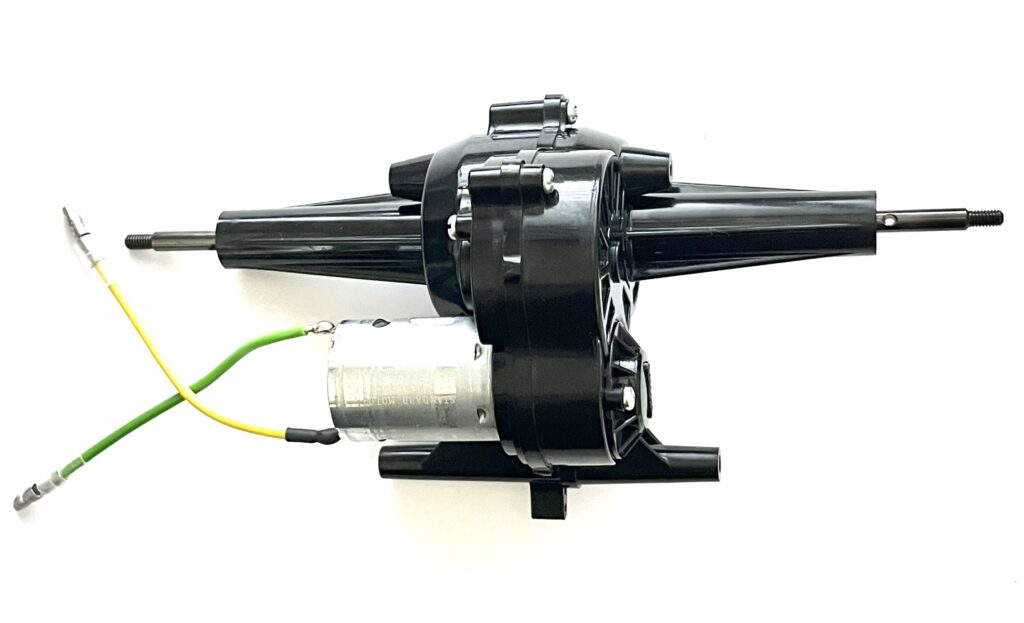
The gearbox is now complete.
Attaching the Motor
Next, we will install the motor, the power source.
This is step “3” in the manual.
The Grasshopper includes a Type 380 motor.
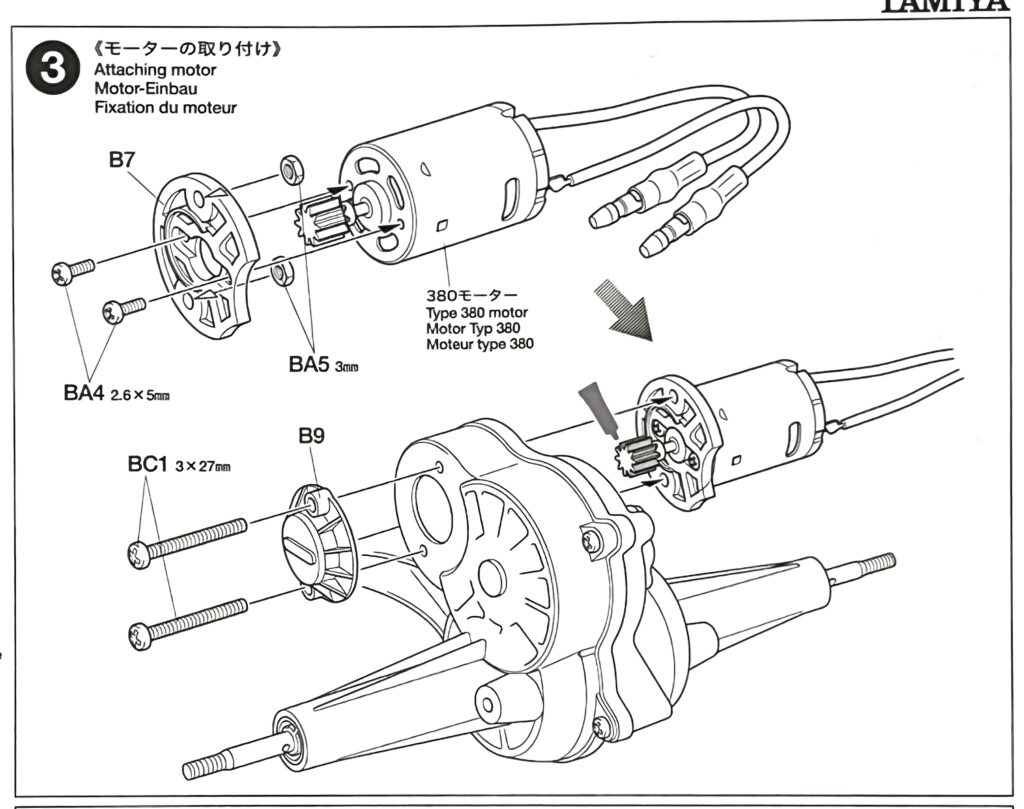
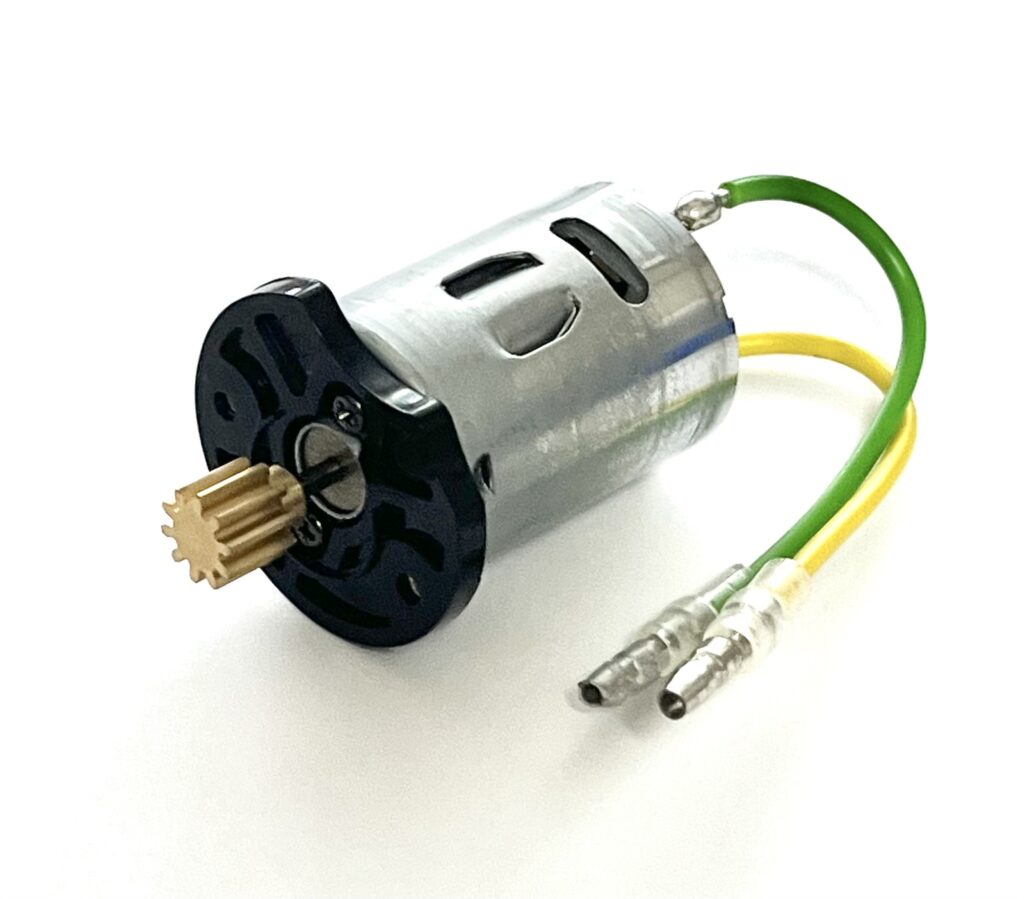
Attaching Parts to the Motor
First, we attach the motor plate to the motor.
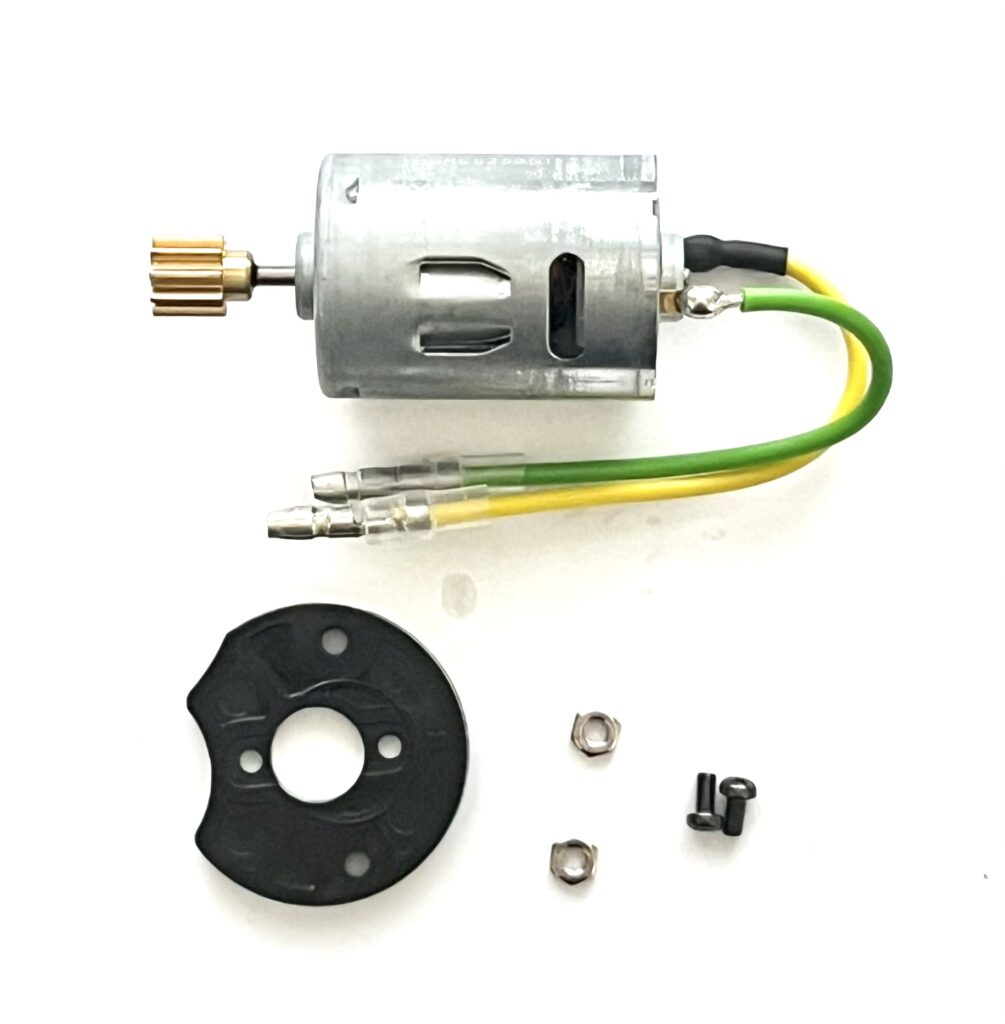
| Part Number | Part Name |
|---|---|
| – | Type 380 motor |
| B7 | Motor Plate |
| BA5 | 3mm Nut x 2 |
| BA4 | 2.6×5mm Round Screw x 2 |
Fit the plate onto the motor.
Secure the plate with the nuts and screws.
Attaching the Motor to the Gearbox
Finally, let’s mount the motor assembly to the gearbox.
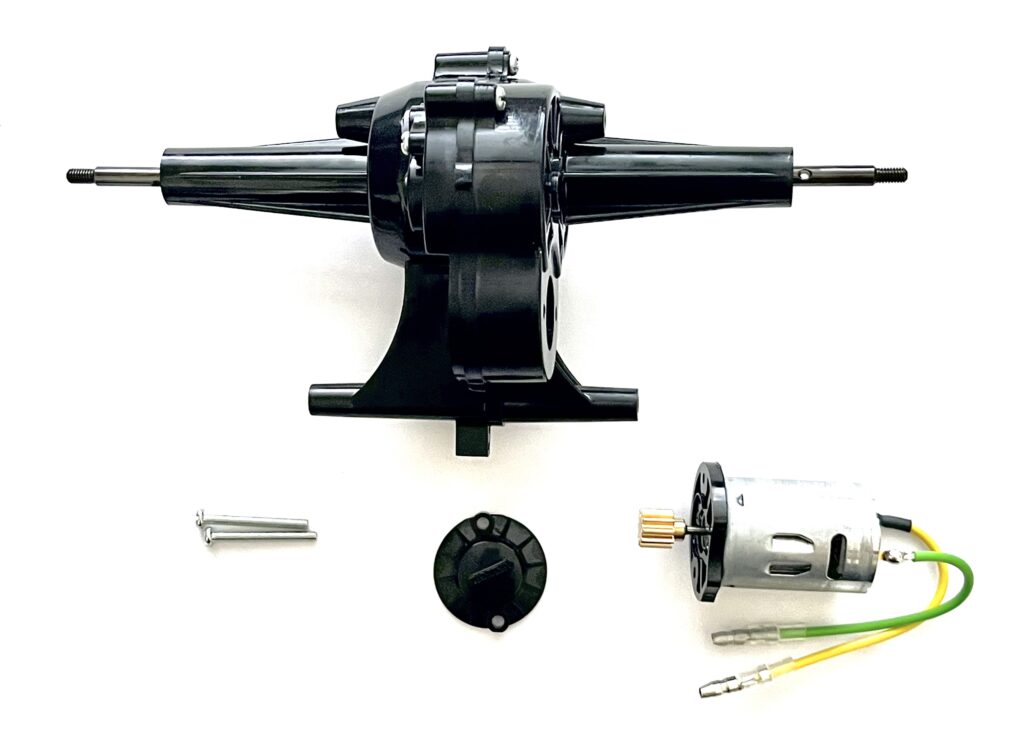
| Part Number | Part Name | Notes |
|---|---|---|
| – | Assembled Gearbox | |
| – | Assembled Motor | |
| B9 | Motor Cover | |
| BC1 | 3×27mm Screw x 2 |
Insert the motor into the gearbox.
The pinion gear will mesh with the counter gear.
Place the cover and secure it with two screws.
Conclusion
Great work!
This time, we’ve completed the gearbox and motor assembly.
The drivetrain for the Grasshopper is now finished.
It’s starting to look more like a proper machine, isn’t it?
Next time, we will attach this gearbox to the chassis.
We will also assemble the rear dampers.
Let’s have fun in the next part of the build!

コメント