Hello everyone!
Welcome back to the RC car build blog.
Last time, we unboxed the Tamiya Grasshopper, taking a look at all the nostalgic parts inside the kit.
▼Click here for the previous article
Tamiya Grasshopper Build Diary Vol. 2:Unboxing! The Weekend RC Life Begins
Today, we finally begin the assembly process.
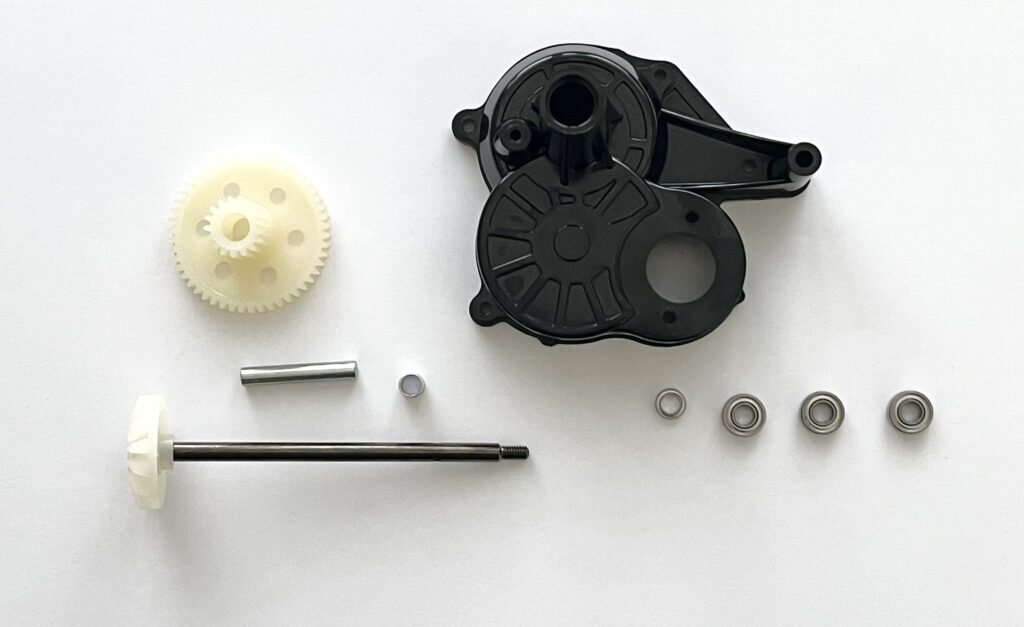
For our first build session, we’ll be working on a crucial part of the drivetrain: the rear shaft and the differential gear.
Let’s build it carefully and correctly.
Today’s Manual Section
This part of the build corresponds to section “1” of the instruction manual. This is where the Grasshopper starts to take shape.
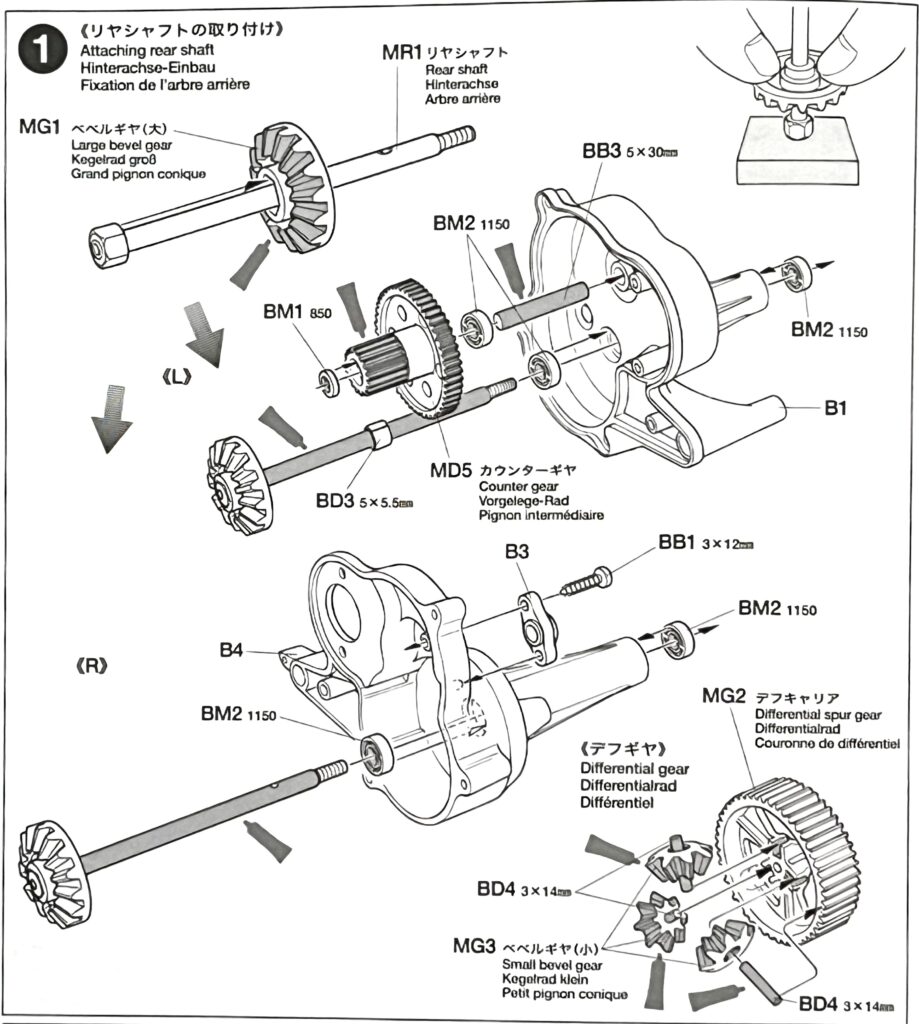
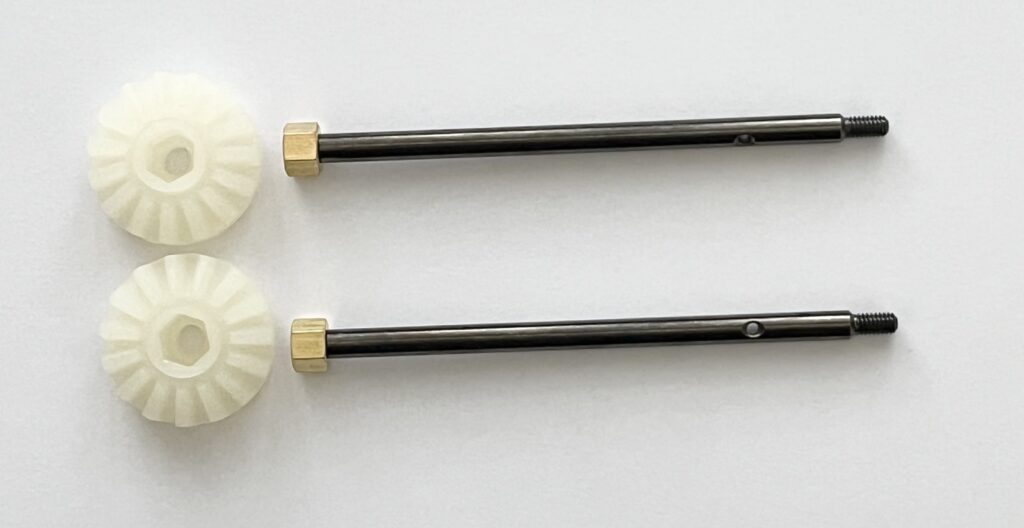
Assembling the Rear Shaft
First, let’s assemble the rear shafts. This involves attaching the large bevel gears to the left and right shafts. It’s a simple but important step.
| Part Number | Part Name |
|---|---|
| MR1 | Rear Shaft x 2 |
| MG1 | Large Bevel Gear x 2 |
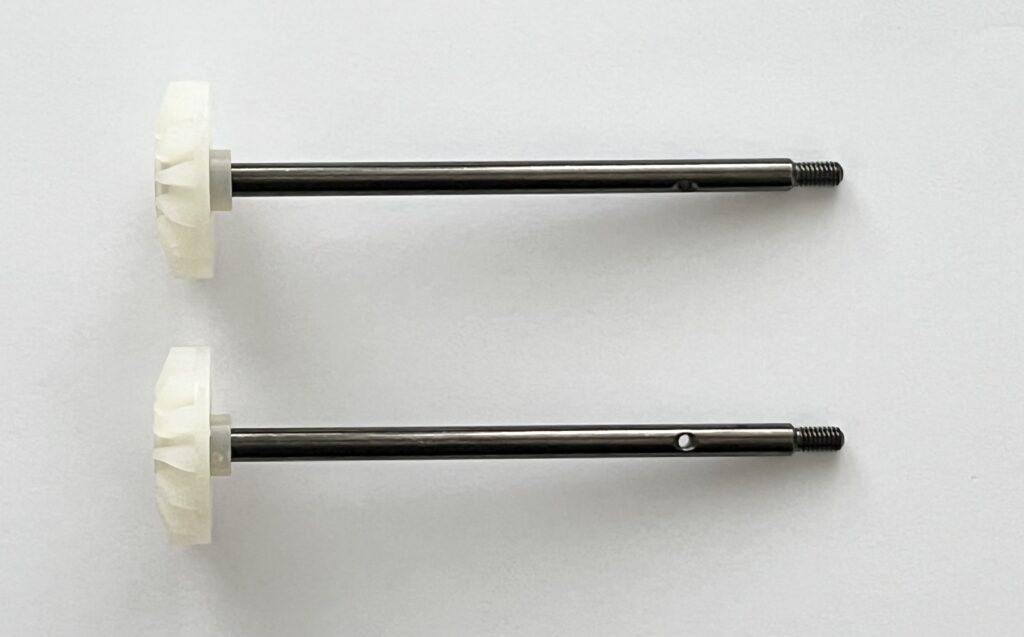
Apply some grease and slide the gears onto the shafts. With that, the rear shafts are ready.
Attaching the Rear Shaft to the Left Gearbox
Next, we’ll install the shaft into the gearbox, starting with the left side. This is where we’ll introduce our first upgrade part.
| Part Number | Part Name | Notes |
|---|---|---|
| B1 | Gearbox (L) | |
| – | Rear Shaft | Since last time |
| BB3 | 5x30mm Shaft | |
| BD3 | 5×5.5mm Pipe | |
| MD5 | Counter Gear | |
| BM1 | 850 Metal Bearing | Swapped for a ball bearing |
| BM2 | 1150 Metal Bearing x 2 | Swapped for ball bearings |
We are upgrading the kit’s standard metal/plastic bushings to optional ball bearings. This will increase drivetrain efficiency and provide smoother performance. It’s a classic and highly recommended upgrade.
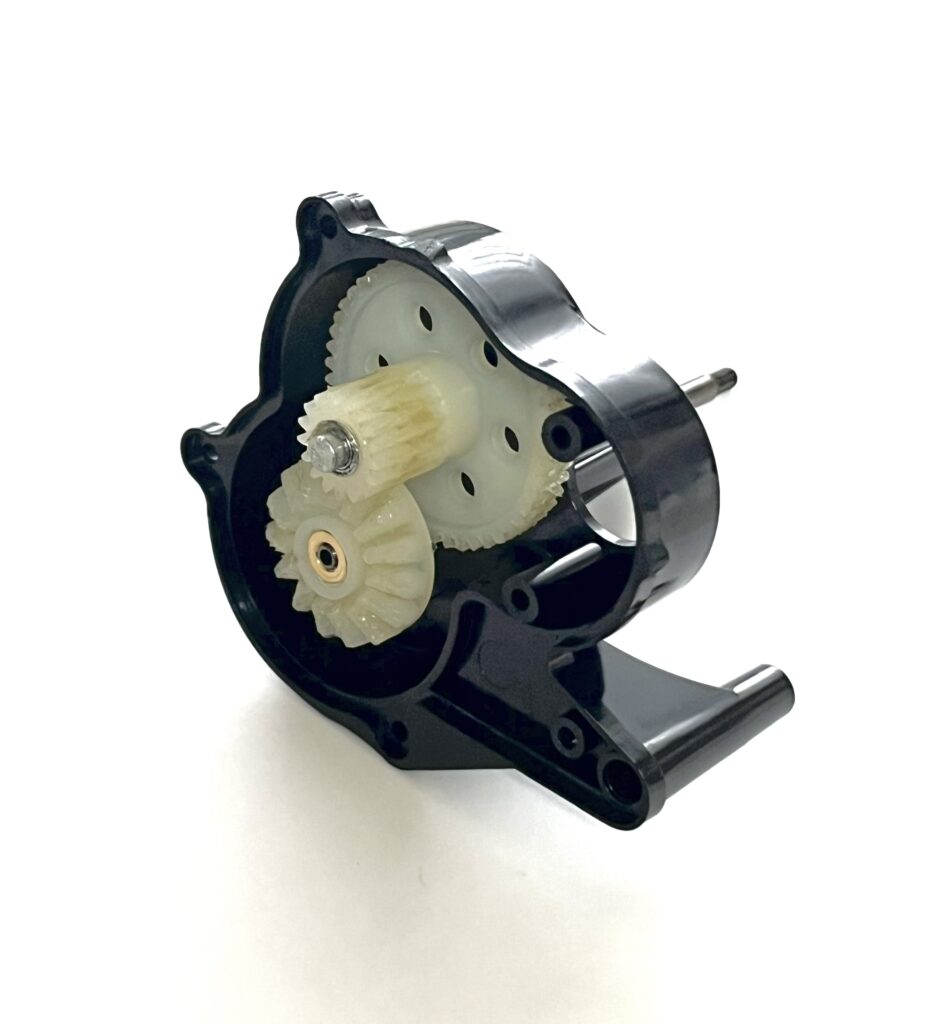
Apply grease thoroughly to all moving parts. Fit the bearings and gears in order. Check that the gears spin smoothly.
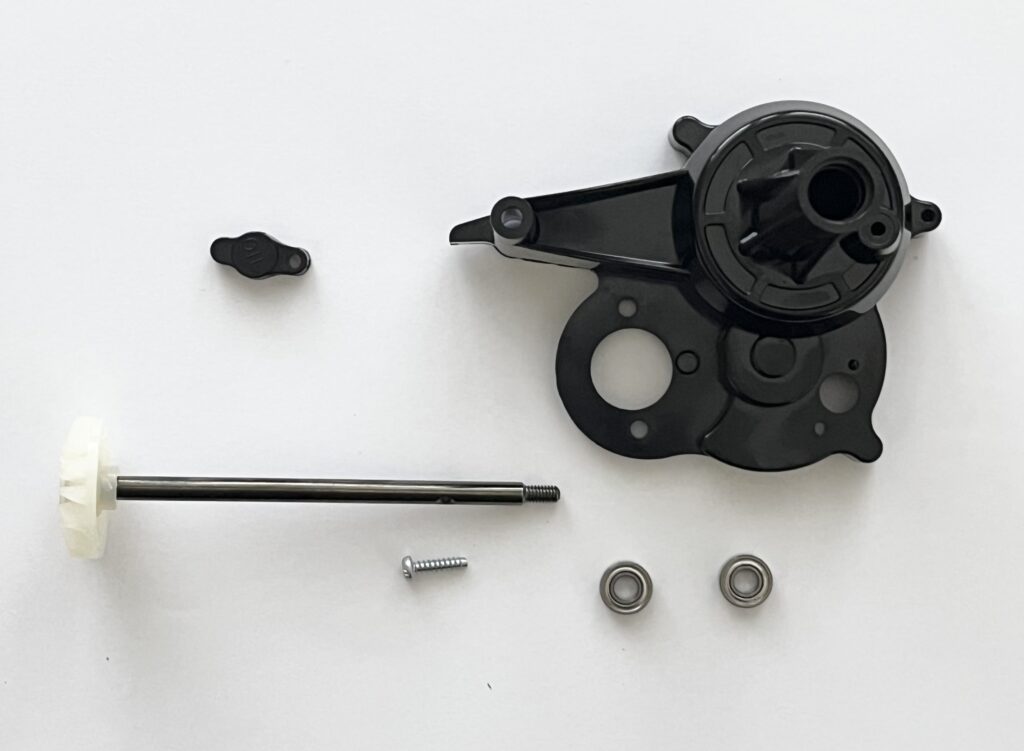
Attaching the Rear Shaft to the Right Gearbox
Now for the right side of the gearbox. The assembly is similar.
| Part Number | Part Name | Notes |
|---|---|---|
| B4 | Gearbox (R) | |
| B3 | – | |
| – | Rear Shaft | Since last time |
| BB1 | 3x12mm Tapping Screw | |
| BM2 | 1150 Metal Bearing x 2 | Swapped for ball bearings |
We’ll install ball bearings on this side as well. Don’t forget to apply grease.
Building the Differential Gear
Finally, let’s assemble the differential gear. This is a characteristic component of the Grasshopper, consisting of three small bevel gears.
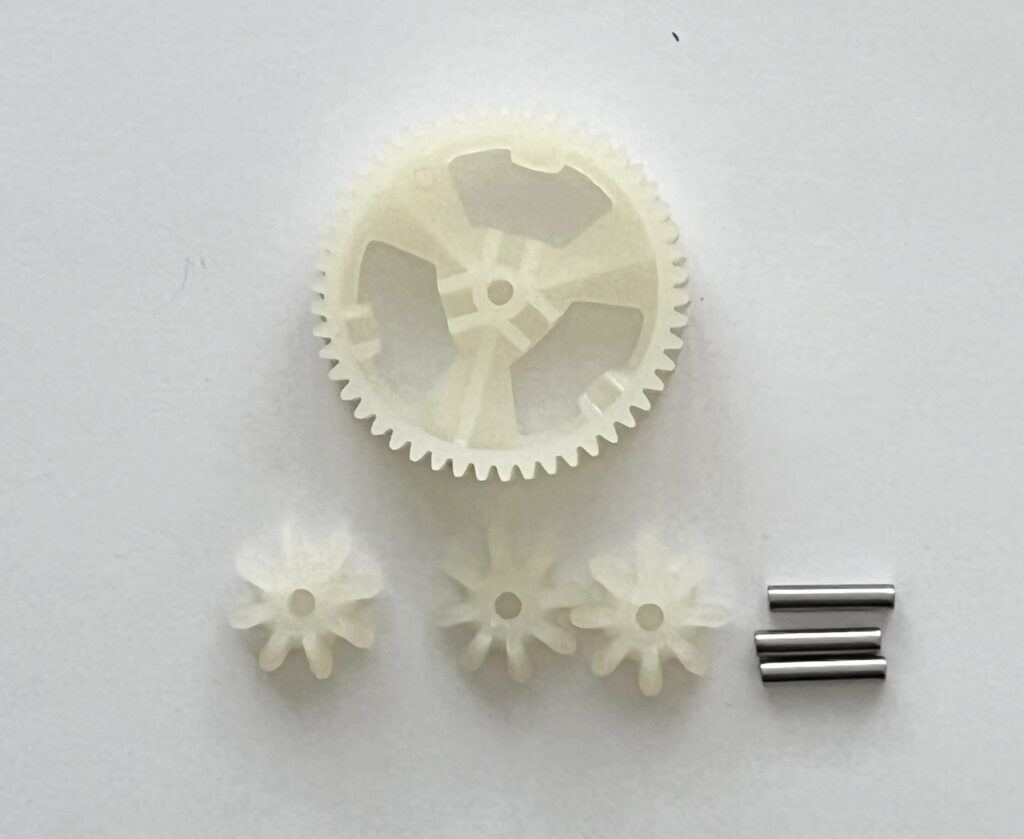
| Part Number | Part Name |
|---|---|
| MG2 | Differential Spur Gear |
| MG3 | Small Bevel Gear x 3 |
| BD4 | 3x14mm Shaft x 3 |
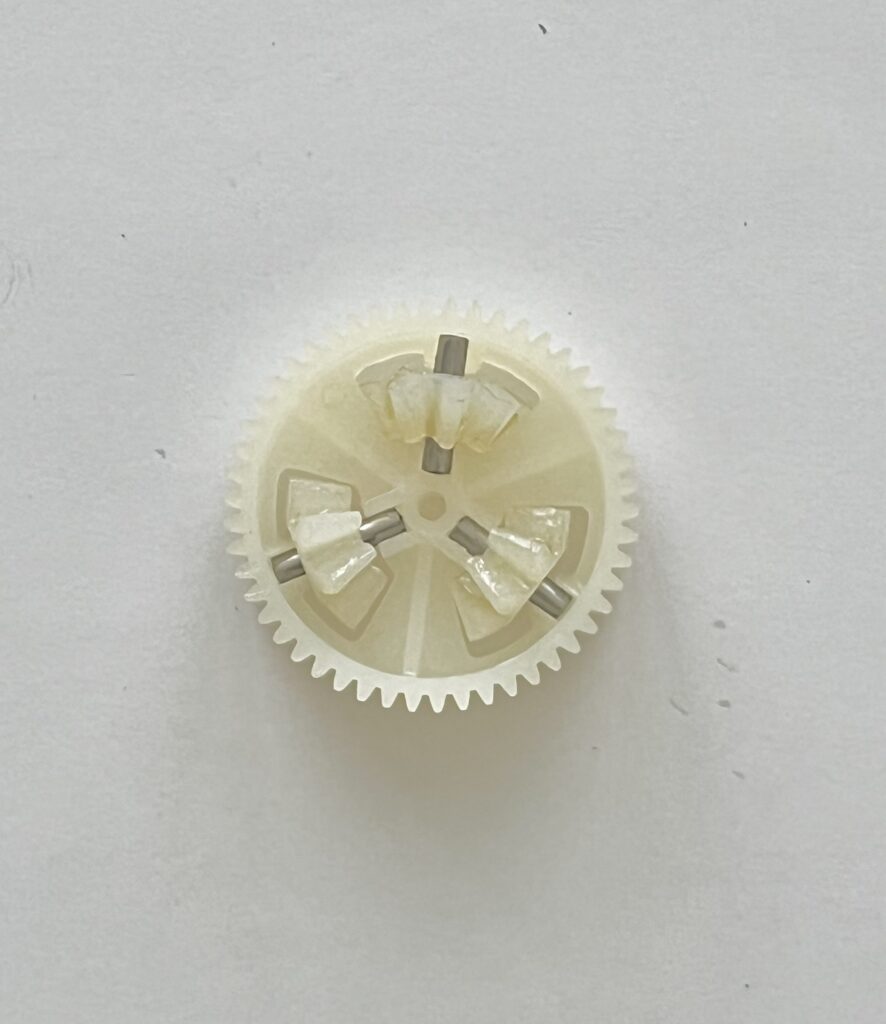
Place the small bevel gears into the differential carrier and insert the shafts to secure them. Be sure to use plenty of grease here as well to ensure smooth gear movement.
Conclusion
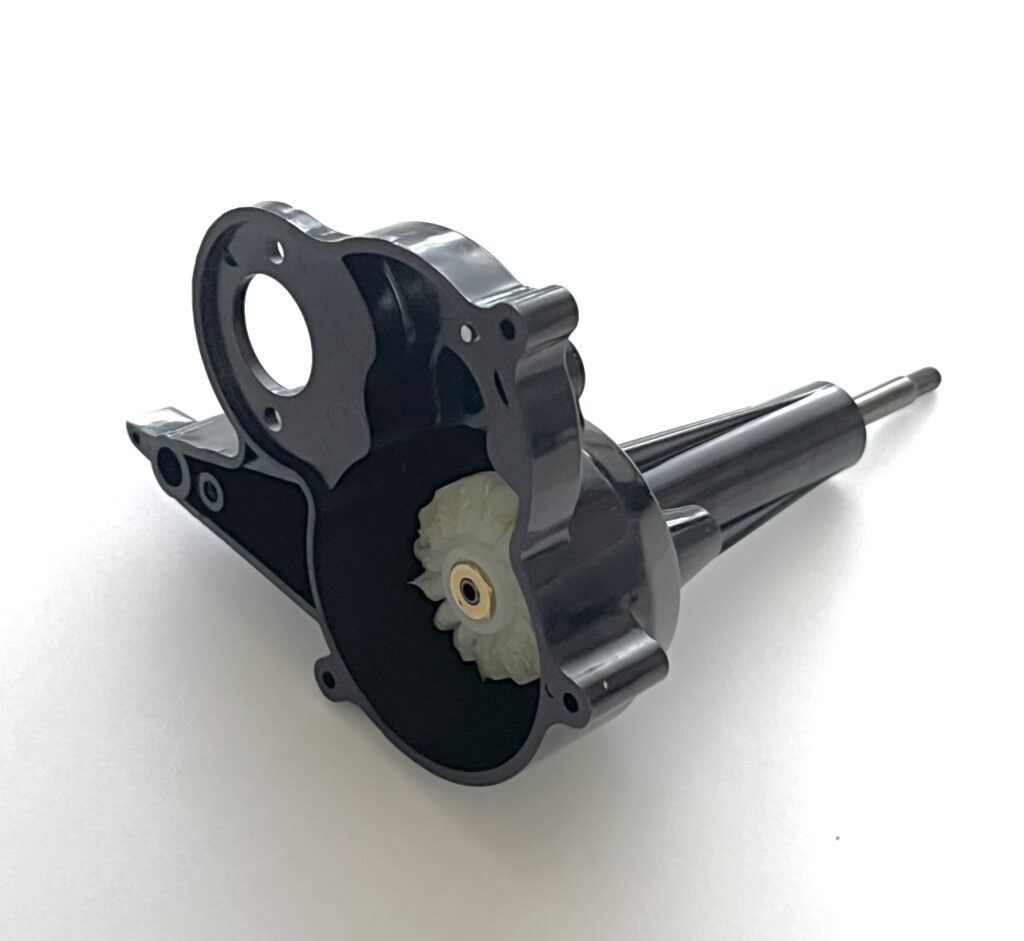
Great job! In this session, we’ve completed the rear shafts and the differential gear.
It’s exciting to see the car starting to come together piece by piece. I’m looking forward to seeing the effect of the ball bearing upgrade.
Next time, we will assemble the gearbox halves and install the motor.
This is the heart of the RC car, so it’s going to be exciting. See you in the next post!

コメント